Self-Hosted Outline Knowledge Base Setup Guide
Outline is an open-source knowledge base and documentation platform that focuses on collaboration and Zettelkasten-style knowledge management. In this guide, we’ll walk through the process of setting up a fully self-hosted Outline instance on an Ubuntu server using Docker and Docker Compose.
Please note that an external authentication provider is required, Outline offers various authentication strategies, though basic email and password authentication is not supported. In this guide, we will use Microsoft Azure Authentication by setting up an Enterprise Application. Other supported authentication methods include Google, Slack, GitLab, and Discord.
Prerequisites
- A server or virtual machine
- Basic knowledge of Linux command line
- Familiarity with Docker and Docker Compose
- At least one supported authentication provider
- A domain or subdomain for the server to point to
Step 1: Initial Server Setup
Begin by configuring your Ubuntu Server environment. For detailed steps, refer to this guide on setting up an Ubuntu Server. I recommend using a non-root user to manage the docker environment and configuration files.
Step 2: Install Docker and Docker Compose
For the official installation instructions for Docker, refer to Docker’s documentation. Follow the steps below to install Docker and Docker Compose.
Step 2.1: Update the system and install necessary prerequisites:
sudo apt-get update
sudo apt-get install ca-certificates curl
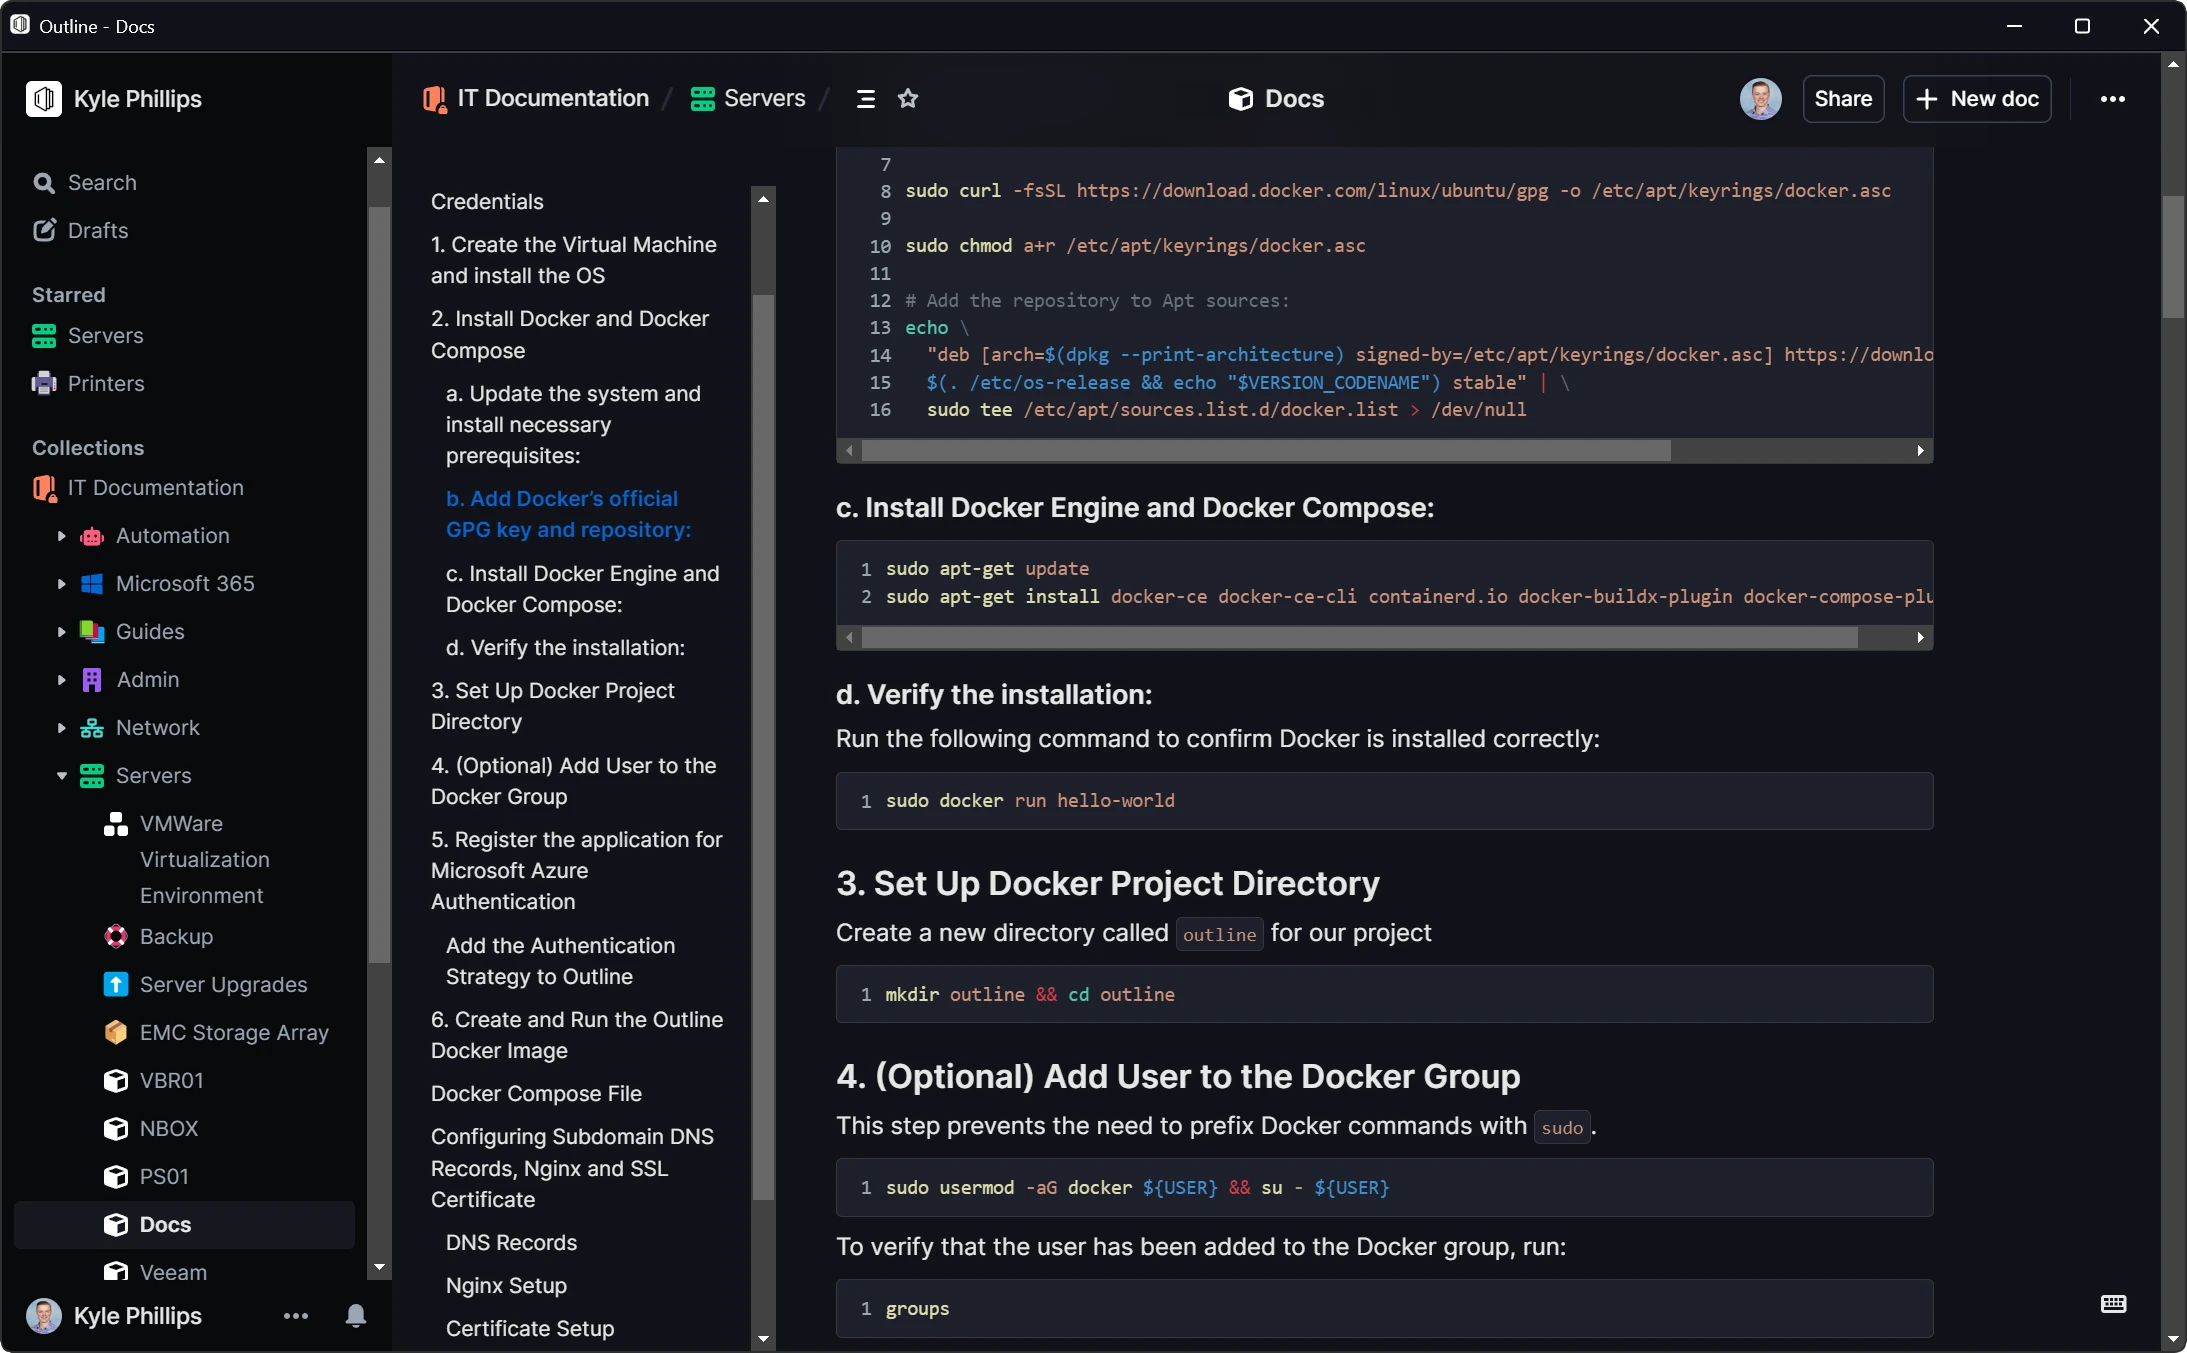
Step 2.2: Add Docker’s official GPG key and repository:
# Add Docker's official GPG key:
sudo install -m 0755 -d /etc/apt/keyrings
sudo curl -fsSL https://download.docker.com/linux/ubuntu/gpg -o /etc/apt/keyrings/docker.asc
sudo chmod a+r /etc/apt/keyrings/docker.asc

# Add the repository to Apt sources:
echo \
  "deb [arch=$(dpkg --print-architecture) signed-by=/etc/apt/keyrings/docker.asc] https://download.docker.com/linux/ubuntu \
  $(. /etc/os-release && echo "$VERSION_CODENAME") stable" | \
  sudo tee /etc/apt/sources.list.d/docker.list > /dev/null
Step 2.3: Install Docker Engine and Docker Compose:
sudo apt-get update
sudo apt-get install docker-ce docker-ce-cli containerd.io docker-buildx-plugin docker-compose-plugin
Step 2.4: Verify the installation:
Run the following command to confirm Docker is installed correctly:
sudo docker run hello-world
Here are some improvements that can make the instructions clearer, more informative, and professional:
Step 3: Create Project Directory
Create a directory for the Outline configuration files and navigate into it.
mkdir outline && cd outline
Step 4: (Optional) Add User to Docker Group
To avoid using sudo with every Docker command, you can add your user to the Docker group. This step is optional but improves convenience when managing Docker containers.
sudo usermod -aG docker ${USER} && su - ${USER}
Note: The su - ${USER} command will log you out and log you back in as the current user, refreshing the group membership without needing a full restart.
To confirm the user has been successfully added to the Docker group, run:
groups
Ensure docker is listed as one of the groups.
Important: Adding your user to the Docker group grants it root-level access, so ensure this is appropriate for your environment. For security-conscious environments, consider the implications of bypassing sudo for Docker commands.
Step 5: Set up the Authentication Provider
For this guide, we will be setting up Microsoft Azure Authentication using a connected Enterprise Application. If you would prefer to configure one of the other supported authentication providers instead, official documentation can be found here.
You will be required to make a note of the following 3 values. Keep this template handy in a separate text editor so you can replace each value as you proceed.
AZURE_CLIENT_ID=xxxxxxxx-xxxx-xxxx-xxxx-xxxxxxxxxxxx
AZURE_CLIENT_SECRET=XXXXXXXXXXXXXXXXXXXXXXXXXXXXXXXXXXXXXXXX
AZURE_RESOURCE_APP_ID=00000000-0000-0000-0000-000000000000
Step 5.1: Set Up Application in Microsoft Azure
- Go to portal.azure.com.
- In the left sidebar, select Microsoft Entra ID (previously called Azure Active Directory).
- Navigate to App registrations and select + New registration.
Step 5.2: Configure Application Settings
- Under Supported account types, choose Accounts in this organizational directory only.
- For the Redirect URI, select Web and enter the following URL:
https://outline.yourdomain.com/auth/azure.callback
- Save the new app registration.
- After saving, make a note of the Client ID, which will look similar to this:
00000000-0000-0000-0000-000000000000
Step 5.3: Set API Permissions
- In the left sidebar, select API permissions.
- Click + Add a permission and select Microsoft Graph API.
- Add the following delegated permissions:
- offline_access
- profile
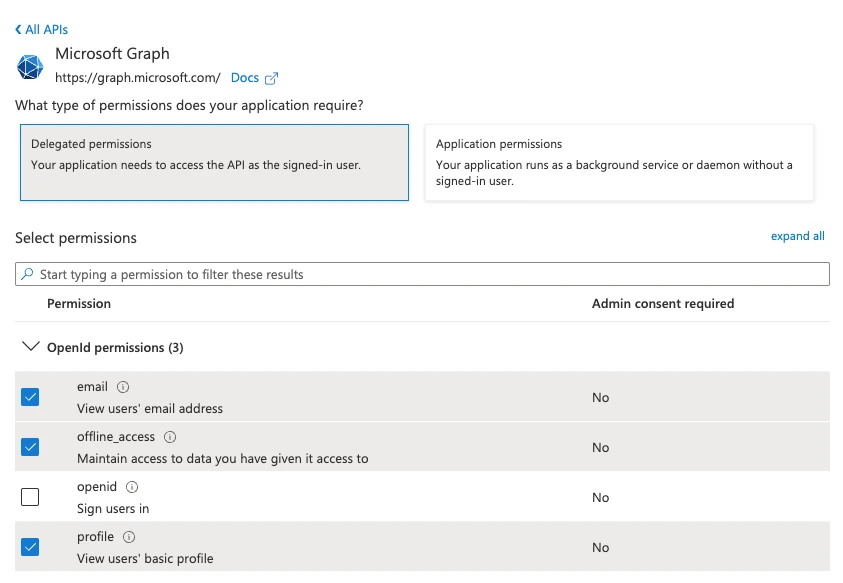
- Save your changes.
Step 5.4: Create Client Secret
- In the left sidebar, select Certificates and secrets.
- Click + New client secret, give it a descriptive name like “wiki”, and set the expiration to 730 days (24 months). The expiration date will be shown, for example: 21 August 2026.
- After saving, make sure to note the resulting secret value. You won’t be able to view it again later, and it should look like this:
XXXXXXXXXXXXXXXXXXXXXXXXXXXXXXXXXXXXXXXX
Step 5.5: Find the Resource App ID
- In the left sidebar, select Manifest.
- Find the
resourceAppIdfield and make a note of its value. It will look similar to this:00000000-0000-0000-0000-000000000000
Your authentication strategy should be all good to go! Keep all the necessary values handy as we will be using them in the following step.
Step 6: Create and Run the Outline Docker Image
Step 6.1: Initialise the Project Directory
Use the following command to create a new directory on the server for your Outline project. We will be using the home directory of a non-root user to store these configuration files.
mkdir -p /home/${USER}/docker && mkdir -p /home/${USER}/docker/logs && cd /home/${USER}/docker
You can use the following command to download the example environment variables and docker compose file for the next steps
curl -O https://gitlab.com/-/snippets/3746346/raw/main/outline.env && curl -O https://gitlab.com/-/snippets/3746346/raw/main/docker-compose.yml
Step 6.2: Configure your Environment Variables
We will begin by configuring the environment variables in the outline.env file. Let’s start by but first we will go through the required changes.
For the SECRET_KEY and UTILS_SECRET we will generate 32 byte random strings. We can do this using the following command:
sed -i -e "s|SECRET_KEY=.*|SECRET_KEY=$(openssl rand -hex 32)|" -e "s|UTILS_SECRET=.*|UTILS_SECRET=$(openssl rand -hex 32)|" outline.env
Alternatively, you can execute this command in another terminal for each line and copy and paste the output into the respective fields in the outline.env file using a text editor of your choice.
openssl rand -hex 32
Open the outline.env file in your preferred text editor and change the URL to the address you will be using for your server, and set the POSTGRES_PASSWORD. Keep a note of the Postgres password since it will be required in the next step.
Finally, set the Azure Login Authentication Variables from the authentication provider we configured in Step 5. If you configured an alternative authentication provider, remove the AZURE specific variables included below and instead use the alternatives provided in the official documentation.
## Required Variables
NODE_ENV=production
SECRET_KEY=
UTILS_SECRET=
FORCE_HTTPS=false
ENABLE_UPDATES=true
WEB_CONCURRENCY=10

## Postgres Variables
POSTGRES_USER=outline
POSTGRES_PASSWORD=supersecretpassword
POSTGRES_DB=outline
DATABASE_URL=postgres://outline:${POSTGRES_PASSWORD}@postgres:5432/outline
PGSSLMODE=disable

## Redis Variables
REDIS_URL=redis://redis:6379

## Domain Variables
URL=https://outline.yourdomain.com
PORT=3000

## Rate Limiting Variables
RATE_LIMITER_ENABLED=true
RATE_LIMITER_DURATION_WINDOW=60
RATE_LIMITER_REQUESTS=600

## Local File Storage Variables - ONLY USE IF STORING ASSETS LOCALLY
FILE_STORAGE=local
FILE_STORAGE_LOCAL_ROOT_DIR=/var/lib/outline/data
FILE_STORAGE_UPLOAD_MAX_SIZE=26214400

## Azure Login Authentication Variables
AZURE_CLIENT_ID=xxxxxxxx-xxxx-xxxx-xxxx-xxxxxxxxxxxx
AZURE_CLIENT_SECRET=XXXXXXXXXXXXXXXXXXXXXXXXXXXXXXXXXXXXXXXX
AZURE_RESOURCE_APP_ID=`00000000-0000-0000-0000-000000000000`
Step 6.3: Prepare the Docker Compose File
Open the docker-compose.yml file in your preferred text editor and update the POSTGRES_PASSWORD in the docker-compose.yaml with the password you used in the outline.env file.
version: "3"

services:
  outline:
    image: docker.getoutline.com/outlinewiki/outline:latest
    env_file: ./outline.env
    ports:
      - "3000:3000"
    volumes:
      - storage-data:/var/lib/outline/data
    depends_on:
      - postgres
      - redis

  redis:
    image: redis
    env_file: ./outline.env
    ports:
      - "6379:6379"
    volumes:
      - ./redis.conf:/redis.conf
    command: ["redis-server", "/redis.conf"]
    healthcheck:
      test: ["CMD", "redis-cli", "ping"]
      interval: 10s
      timeout: 30s
      retries: 3

  postgres:
    image: postgres
    env_file: ./outline.env
    ports:
      - "5432:5432"
    volumes:
      - database-data:/var/lib/postgresql/data
    healthcheck:
      test: ["CMD", "pg_isready", "-d", "outline", "-U", "user"]
      interval: 30s
      timeout: 20s
      retries: 3
    environment:
      POSTGRES_USER: "outline"
      POSTGRES_PASSWORD: "supersecretpassword"
      POSTGRES_DB: "outline"

volumes:
  storage-data:
  database-data:
Step 6.4: Run Docker Compose
Now that our Environment variables and Docker Compose file are set, let’s launch our Docker containers by using the following command:
docker compose up -d
Your Outline server should now be running! But before we can use it, we will need to set up the reverse proxy server in order to access it from the correct location.
Step 7: Configuring DNS, Nginx, and SSL Certificates
Configure the DNS settings of your domain to point to the IP address of the Outline server. We will be setting up an Nginx server as a reverse proxy to access our Outline server from outside our network.
Step 7.1: Nginx Setup
Proceed with the basic setup of Nginx on the server. This will be our secure reverse proxy for the Outline server.
sudo apt update
sudo apt install nginx
sudo ufw allow 'Nginx HTTP'
sudo ufw allow 'Nginx HTTPS'
Step 7.2: Certificate Setup with Let’s Encrypt
We’ll use Let’s Encrypt to obtain a free SSL certificate. This guide assumes you want a standard certificate for a single domain.
Install Certbot
First, install Certbot and the Nginx plugin:
sudo apt install certbot python3-certbot-nginx
Obtain the SSL Certificate
Use Certbot to obtain an SSL certificate for your domain. Replace example.com with your actual domain.
sudo certbot --nginx -d example.com
Certbot will handle the process of verifying your domain and obtaining the SSL certificate. It will also configure Nginx automatically for you.
Verify the SSL Certificate
Check that your SSL certificate has been installed correctly by visiting your domain using HTTPS (e.g., https://example.com).
Configuring Nginx as a Reverse Proxy
- Remove the default site from Nginx:
sudo rm /etc/nginx/sites-available/default /etc/nginx/sites-enabled/default
- Create a new site configuration in
/etc/nginx/sites-available/outline:
sudo vim /etc/nginx/sites-available/outline
- Configure the following content in
/etc/nginx/sites-available/outline:
server {
    listen 80;
    listen [::]:80;

    server_name example.com;

    return 301 https://$host$request_uri;
}

server {
    listen 127.0.0.1;
    listen 443 ssl http2;
    listen [::]:443 ssl http2;

    server_name example.com;

    access_log off;
    error_log /home/sysop/docker/logs/error.log;

    # security - prevent information disclosure about server version
    server_tokens off;

    ssl_certificate /etc/letsencrypt/live/example.com/fullchain.pem;
    ssl_certificate_key /etc/letsencrypt/live/example.com/privkey.pem;

    ssl_protocols TLSv1.2;
    ssl_ciphers 'EECDH+AESGCM:EDH+AESGCM:AES256+EECDH:AES256+EDH';

    ssl_prefer_server_ciphers on;
    ssl_session_cache shared:SSL:10m;
    ssl_session_timeout 180m;

    ssl_stapling on;
    ssl_stapling_verify on;

    client_max_body_size 25m;

    location / {
        proxy_pass http://127.0.0.1:3000;

        proxy_set_header Upgrade $http_upgrade;
        proxy_set_header Connection "Upgrade";
        proxy_set_header X-Forwarded-For $proxy_add_x_forwarded_for;
        proxy_set_header Host $host;
        proxy_set_header X-Real-IP $remote_addr;
        proxy_set_header X-Scheme $scheme;
        proxy_set_header X-Forwarded-Proto $scheme;

        proxy_redirect off;
    }
}
- Create a symbolic link to enable the configuration:
sudo ln -s /etc/nginx/sites-available/outline /etc/nginx/sites-enabled/outline
- Restart Nginx to apply the changes:
sudo systemctl restart nginx
Your Outline server should now be securely accessible on your domain. 🎉